"...its another story plotting out your plans, remembering that the complexity of the your idea directly influences the build cost."

J Coomer

Finally found a clothing brand that resonates with my sense of urban style. The designs are edgy and fashion-forward, which is exactly what I was looking for.

Customer
Ethan

As a sustainability advocate, I'm thrilled to have discovered this clothing brand. It's heartwarming to support a brand that cares about the planet as much as I do.

Customer
Sophia

Yacht Cockpit & Steering

Where do you start?

This video gives an overview of a little of the steering build.

The steering was built at the same stage as the internal fitout commenced. 

There are some important considerations that need to be completed also at this very early stage, such as gas piping and heating.

We discuss this shortly.

Catamaran Steering

Catamaran or sailboat steering systems, have you ever tried to locate information? This steering system did not form part of our design plans and much effort was put into its design for obvious reasons.

We have gone into much more detail on this, our reasons and their associated drawings in our Catamaran Building Adventure Book, from the sizing of the steering cog, to the linking of the cables.

Attached are the end products of our steering drawings, from the 'helm wheel' through to the 'rudder arm'. The whole system will be connected with cable and tensioned with turn-buckles. Very simple, no hydraulic fluids, leaks or pumps needed.

sailboat steering

Steering assembly test fit.

sailboat sheaves

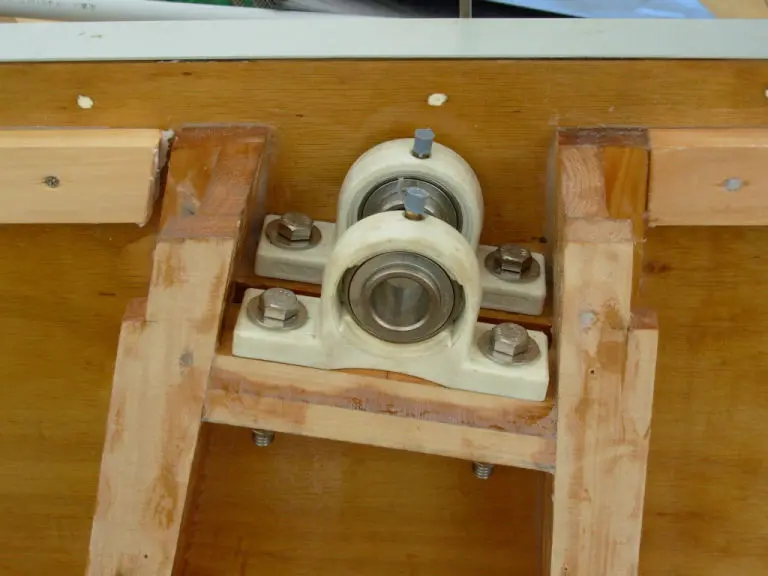
Food grade stainless steel bearings, used to hold the steering wheel and cog assembly.

sailboat sheaves

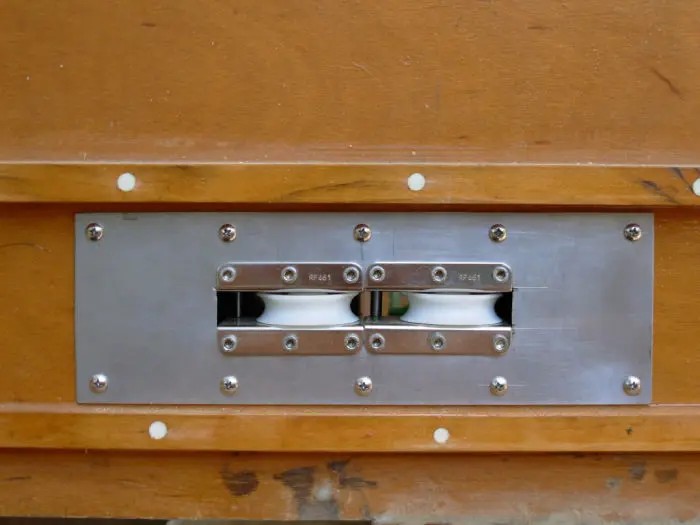
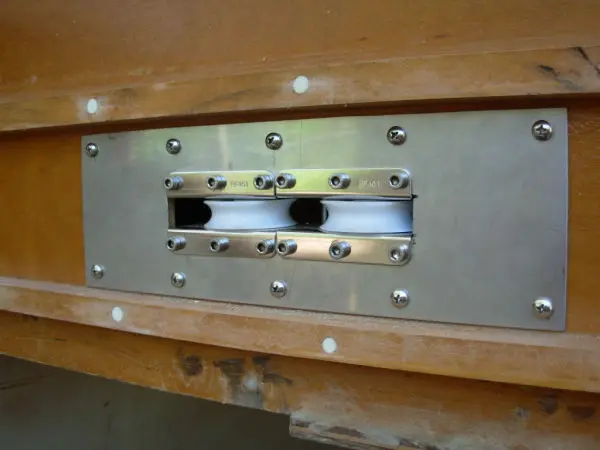
From the steering bearings & cog, cables run to the lower sheaves before turning and running to the aft sheaves, then connected to the connector arm.

sailboat rudder sheaves

Aft sheaves used for redirecting steering cables from the connector arm to the forward sheaves & steering wheel assembly.

sailboat rudder arm

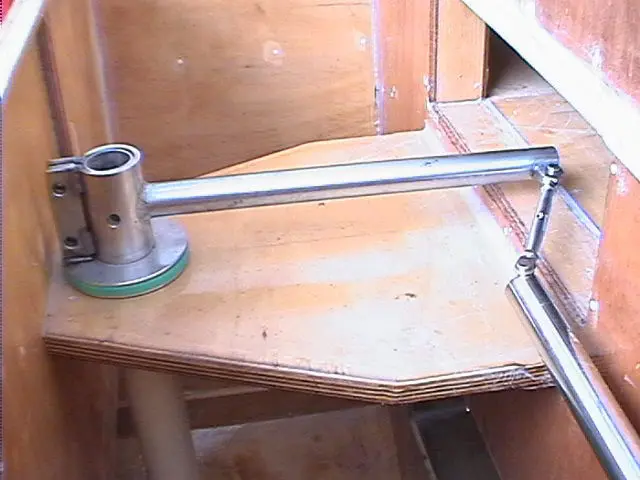
Connector arm connects both side rudder assemblies together.

sailboat steering attachment

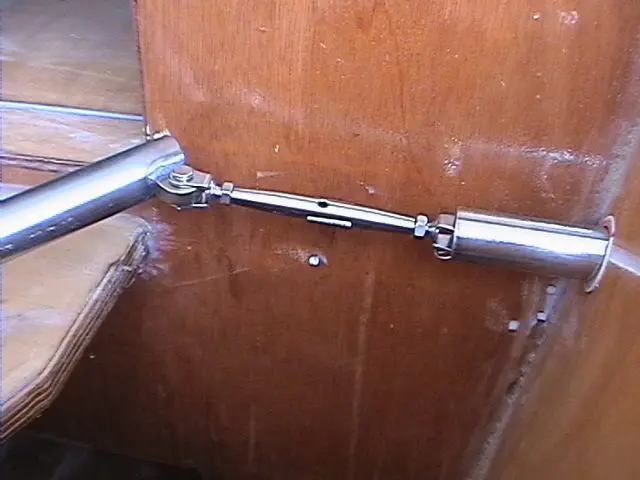
The connector arm joins an adjustable turnbuckle to the rudder arm. This turnbuckle can then be easily disconnected in the event of rudder failure.

sailboat rudder arm

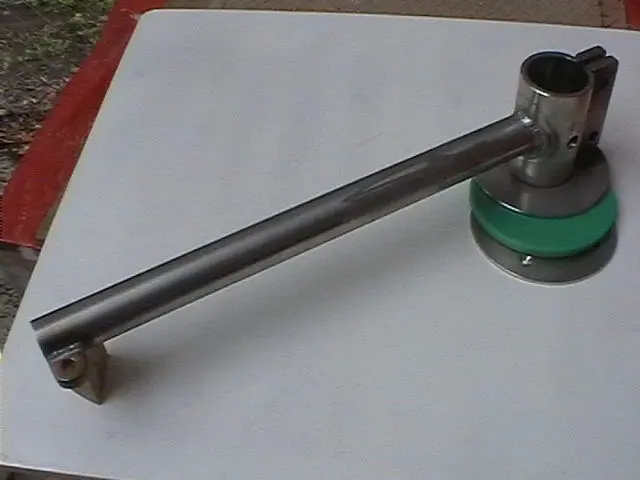
Rudder arm connected connected to the rudder pole. This assembly is duplicated on the other side.

sailboat rudder arm

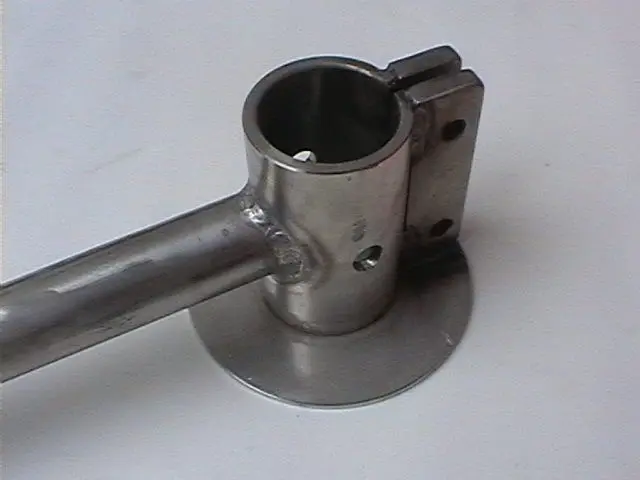
The make-up of the rudder arm assembly - three pieces.

rudder arm

The upper rudder pole is then bolted through the eye of this rudder arm.


The 'sheave boxes' are common products that have been installed with the thought of replacement, in the back of our minds.

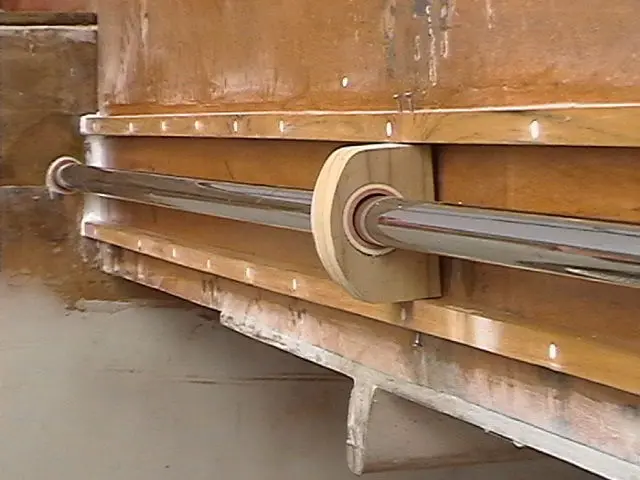
Therefore their positioning and securing is all accessible once the yacht is finished. The cables exit from the aft frame and are secured to the 'rudder pole'. The 'rudder pole' extends the full length of the aft beam and is in turn connected to each rudder arm (the components atop the actual rudder pole and rudders).

The 'rudder pole' is covered to protect it from the elements, water ingress and little boys who think they are Tarzan.

A hatch has been cut to provide full access to the aft steering sheaves and connection points on the rudder pole.
Cockpit design and fitout

Given that much time would be spent here, it was decided to make it extremely functional with as much floor space as possible. After jotting down the requirements from a ‘practical non-nautical point of view’ and ‘minimum nautical requirement point-of-view’, we came up with a 'windows wish list'.

While these may appear to be common sense items as you read, its another story plotting them out, remembering that the complexity of the idea/build directly influences the cost.

Items here included, a large access door, the largest possible windows, the ability for maximum opening of doors and windows, steering station to starboard, a steering station seat. Other requirements included, comfortable cockpit seats, easily accessible sailing instrument panel (that could be viewed from the aft area of each hull without duplicating instruments), simple and easy autopilot control, simple access area to the engines and refueling and lastly a large table that could be used for storage and a seat.

sailboat cockpit design

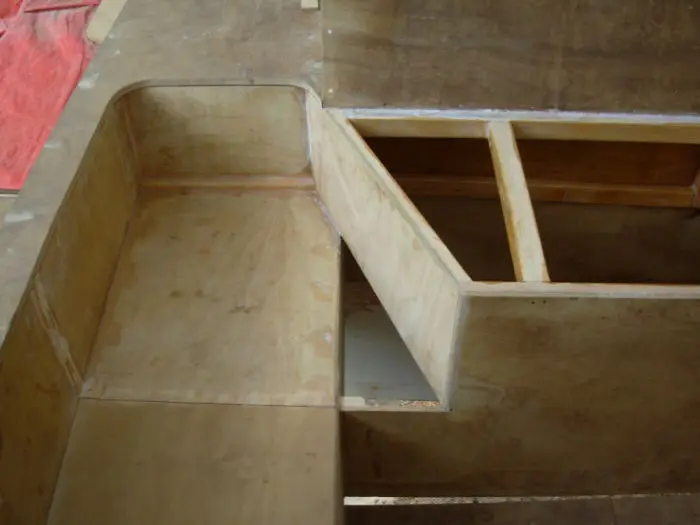
Designing the aft step while not compromising the strength of the aft frame. 

sailboat cockpit design

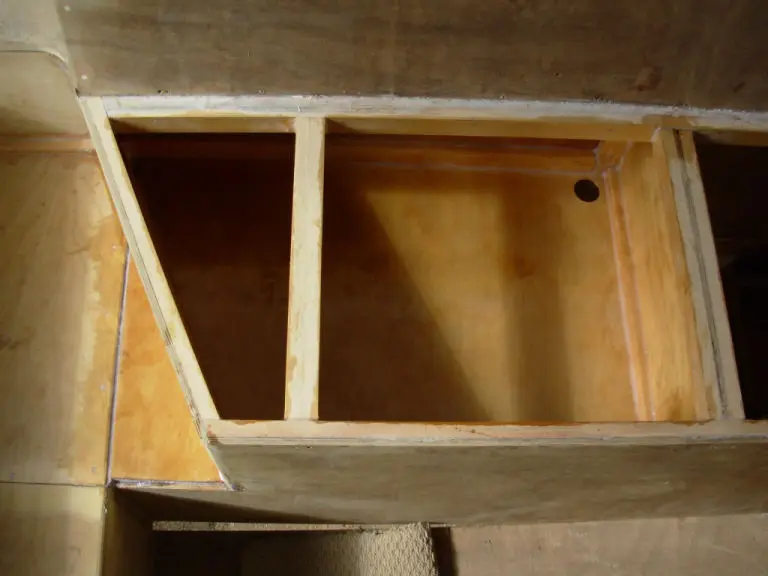
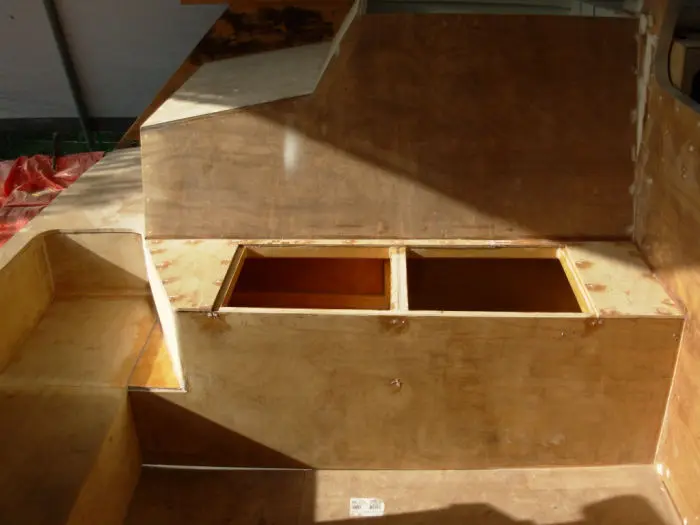
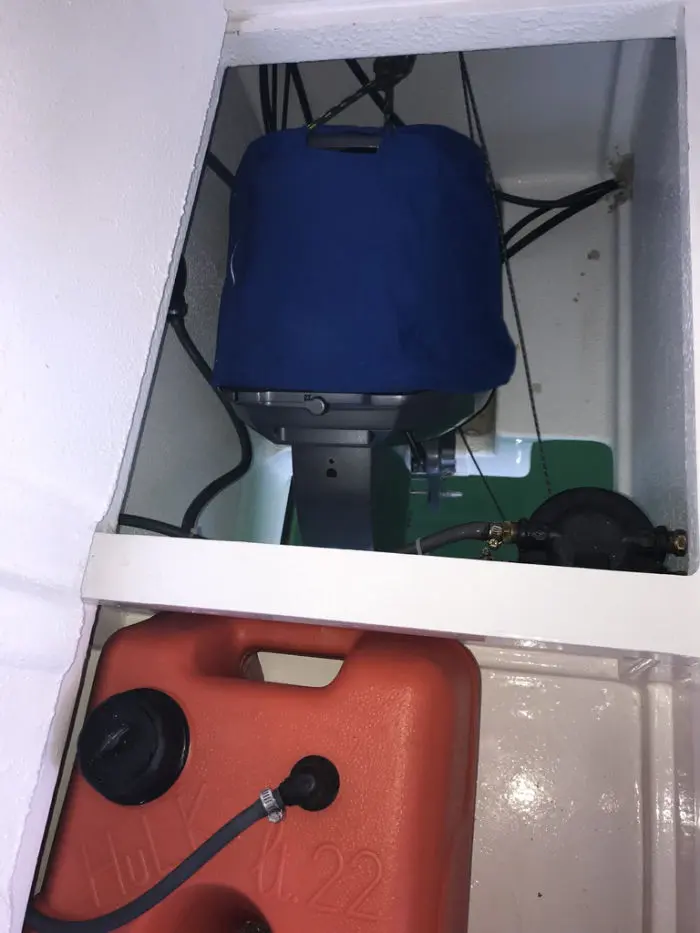
Aft cockpit entry step joins the outboard motor locker, which has space as shown to accomodate a 20-litre plastic unleaded fuel tank. Sufficient space remains below the fuel tank locker to allow the outboard motor to be tilted up and not hit the locker floor. This locker has an external vent/drain and was heavily resined before painting.

sailboat cockpit design

The outboard motor locker (identical both sides), has aft fuel tank space with the forward part allowing access to the top of the outboard motor.

sailboat cockpit design

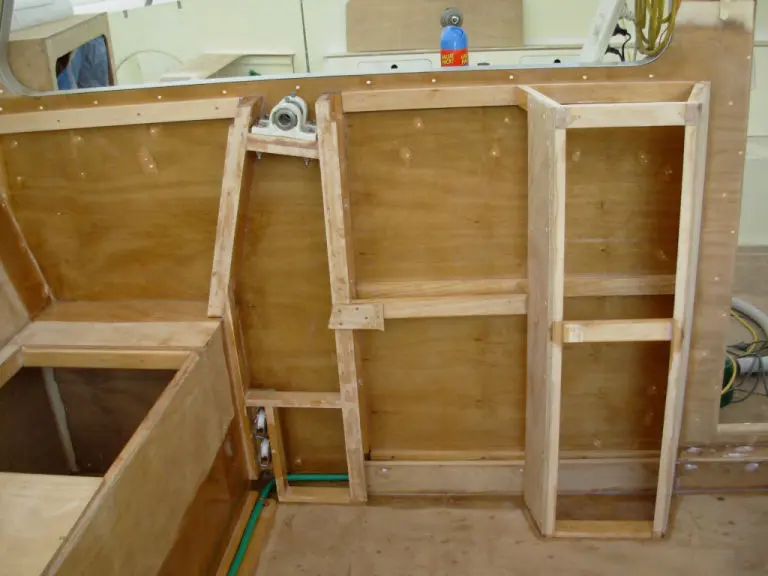
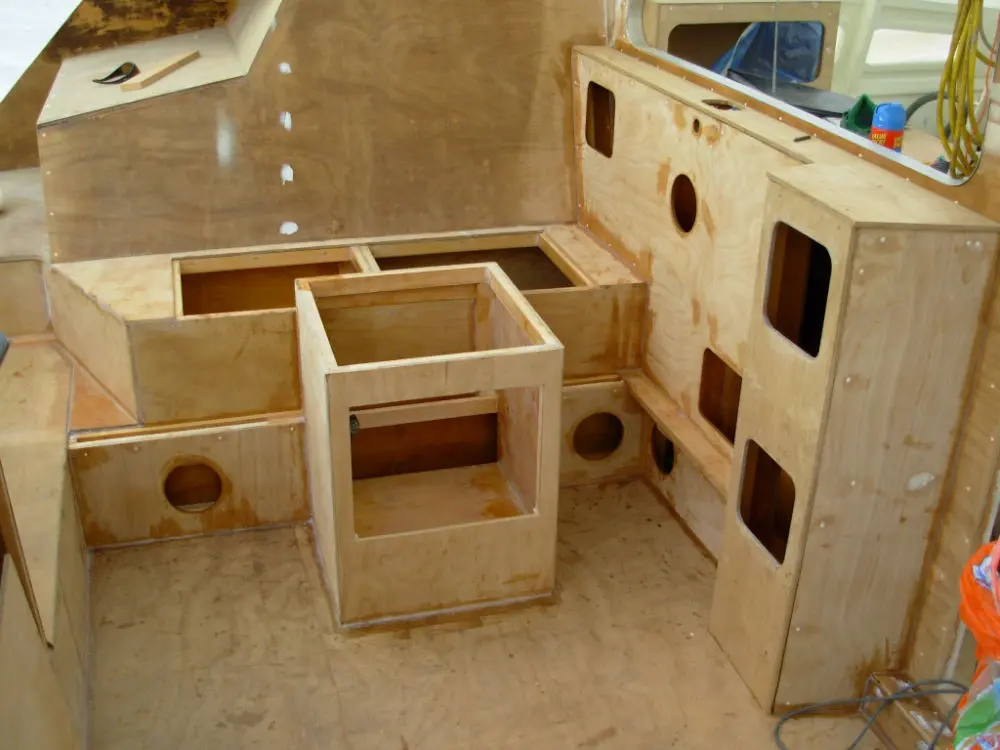
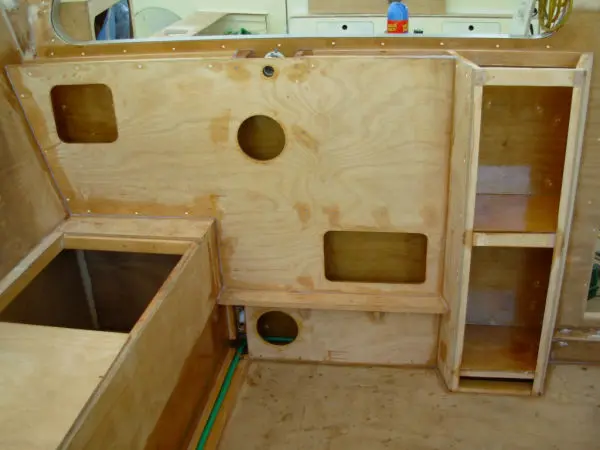
On the forward face of the outboard motor locker, is a cavity that carries the steering cables and gas hot water pipe (green).

sailboat cockpit design

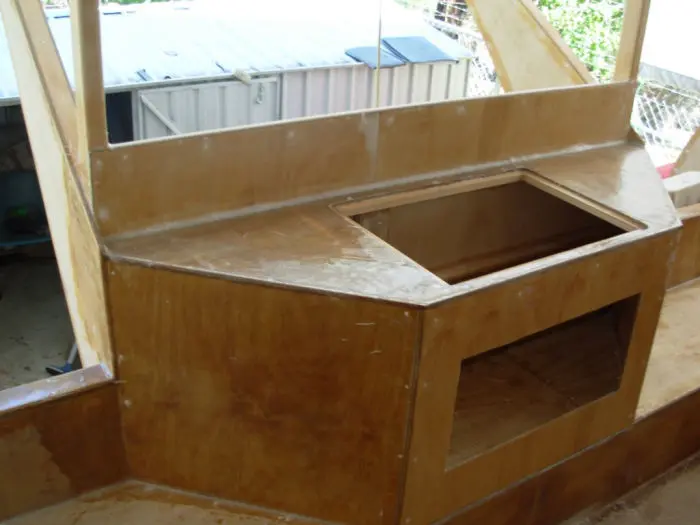
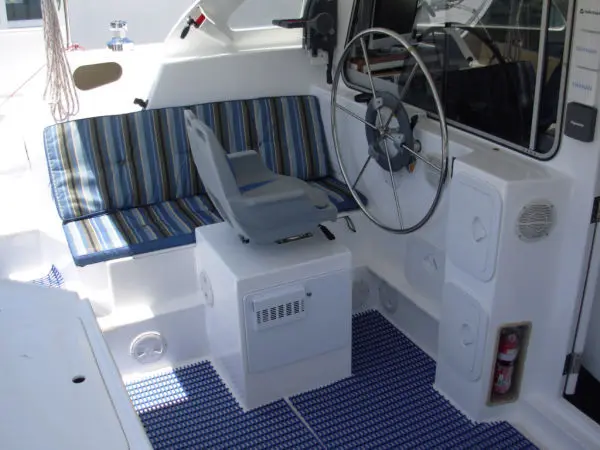
The gas hot water unit in place, being used also for the helm seat. The vertical steering station panel has access to areas for outboard motor starter batteries and electrical switches.

sailboat cockpit design

Aft cockpit cupboard, used for storage. The access is big enough to take a good size esky. In this locker, below the false floor, is an area reinforced to carry a spare anchor and chain.

sailboat cockpit design

Completed outboard motor forward of the fuel locker. Motor is tilted up. Note an additional fuel filter in here too.


The cockpit entry has also been made to provide easy access with large steps into the cockpit. We have also chosen an internal opening bi-fold door. This door can be opened by half or completely if maximum airflow is needed. The door then backs onto the map table, out of the way of all walkway areas and very eye-pleasing when in the cockpit area.

Two cockpit windows face forward, the whole starboard window can be quickly removed internally providing full airflow when required for those hot days. The side turret windows are all fixed. The port window is sliding with good all-weather seals and a reasonably large drainage gutter at the base.

considerations required at this stage

water heater

sailboat cockpit design

The Gas system is also external with the unit under the helm seat. These should be installed by a professional at this early stage of the build.

It just happens that they run in the same space as our cables. All the round holes here are for gas and steering access.

Choose your gas hot water heater carefully, some claim good heating but at the same time 70% of their heat-energy is vented overboard wasting this precious gas resource, more importantly, your money.

helm area, space for batteries

sailboat cockpit design

All timber in the cockpit were resined both sides. Additionally, glass was applied to waist height within the cockpit for extra durability from the elements.

This area is 'hose-friendly', that is it can easily be washed with a hose, no need for any gentle 'touchy-feely' stuff out here.

cable sheaves & gas

sheaves

State Gas regulations may require external gas piping. This needs to be planned now, at this stage of the build.

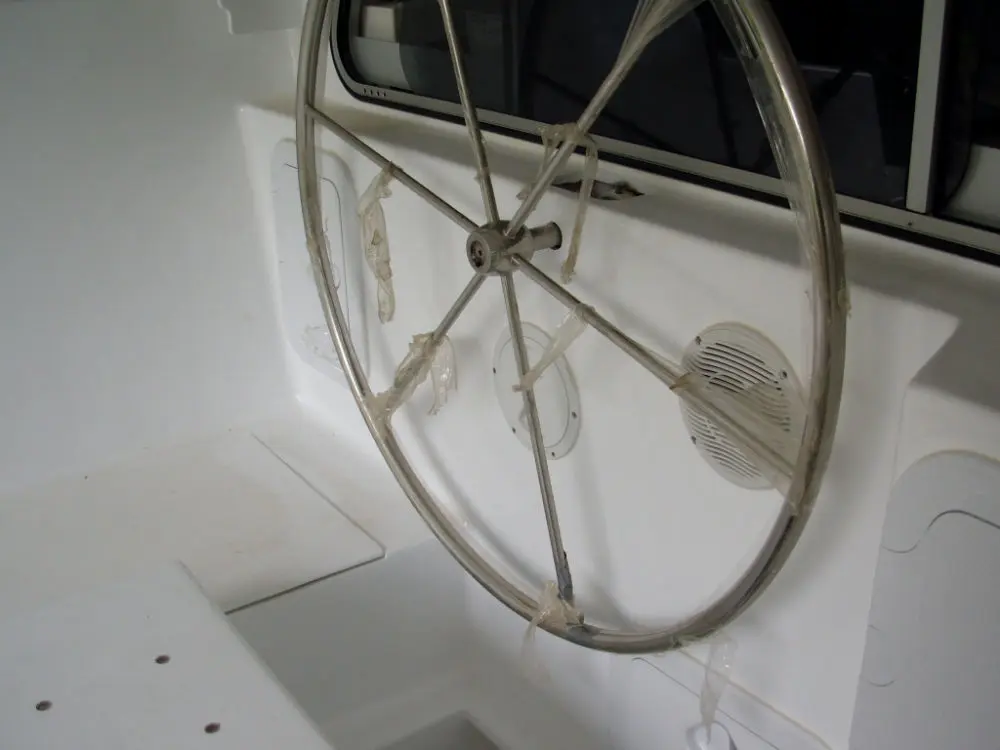
What size helm wheel do you want?

You will need the wheel to mark its position so that it does not encroach on other lockers, such as the engine locker (this lockers size can't be changed).

© Copyright 2009-2024 www.diycatamaran.com - All Rights Reserved